Self-leveling compound failures, why it cracks or flakes, and how to prep concrete so it bonds
A self leveling pour looks almost magical, until it doesn’t. One week the floor feels smooth, the next week we’re hearing hollow spots, seeing hairline cracks, or watching the surface shed powder like dried chalk.
Most self leveling compound failures come down to one thing: the slab and the prep didn’t match the product’s needs. Think of it like paint on a dusty wall. The paint can be great, but it can’t grip what it can’t touch.
Below, we’ll break down what cracking and flaking really mean, why they happen, and how we prep concrete so self leveling compound bonds the way it’s supposed to.

What self leveling compound should do, and what failure actually looks like
Self leveling compound is a cement-based underlayment we pour to smooth a slab before tile, LVP, engineered wood, carpet, or hardwood transitions. It’s meant to create a flat, dense, bonded layer that supports the finished floor, not a fragile “skin” floating on top.
When it fails, the symptoms usually show up fast, and they’re surprisingly consistent:
| What we see | What it often means | What we check first |
|---|---|---|
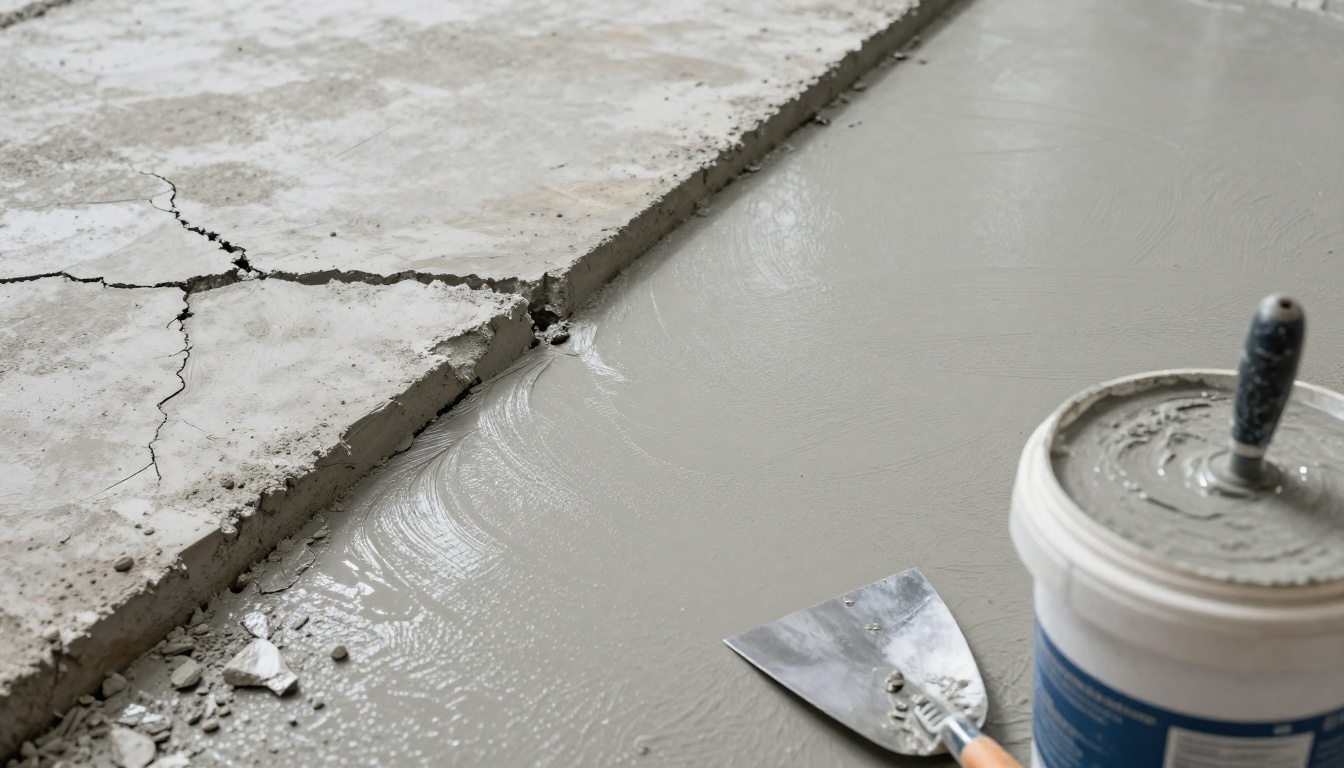
| Spiderweb cracks | Mix too wet, too thin, or dried too fast | Thickness, water ratio, room temp, airflow |
| Flaking or peeling at edges | Weak bond, dirty slab, missing primer | Dust, paint, sealer, primer coverage |
| Hollow sounding spots | Debonding over smooth or contaminated concrete | Surface profile, grinding, moisture history |
| Powdery surface (dusting) | Overwatering, improper cure, or weak concrete | Mix method, substrate strength, humidity |
A key point: “self-leveling” doesn’t mean “forgiving.” It won’t fix a slab with loose, spalling concrete, and it won’t stick to old glue residue just because we poured it thicker.
For industry perspective on why primer, mixing discipline, and surface prep matter so much, we like this trade-focused breakdown: tips for success with self-levelers.
Why self leveling compound cracks, flakes, or debonds
We can group most failures into four buckets: bond issues, movement, moisture, and mixing/application mistakes. They overlap, which is why a quick “patch and re-pour” often fails again.
Bond issues: the slab is too smooth, too dirty, or sealed
Concrete can look clean and still be a bond-breaker. Paint overspray, curing compounds, sealers, waxy cleaners, drywall dust, and old adhesive residue can keep primer from soaking in. If primer can’t bite, the self leveling compound can’t lock on.
We also see problems when the slab is mechanically too slick. Steel-troweled concrete can be dense and shiny, which is great for durability, but bad for bonding unless we profile it.
Movement: cracks telegraph, joints get buried, wood subfloors flex
Self leveling compound isn’t a “structure.” If the slab is actively cracking, or if we pour across control joints without honoring them, the leveler can crack right on cue. Over plywood, bounce and deflection can also fracture a rigid cement layer if the system wasn’t designed for wood.
Moisture: vapor pressure pushes and softens the bond
Moisture doesn’t need to be visible to cause failure. Vapor moving up through a slab can weaken primer, break down some adhesives used later, and lead to debonding that sounds hollow. Basements and lower levels are the usual suspects, but we’ve seen it on main floors too, especially near exterior doors and under kitchen appliances.
If we’re planning basement floors, we also want the whole assembly to make sense, not just the leveler. This guide helps connect moisture risk to underlayment choices: Basement hardwood floor underlayment options.
For a simple explanation of concrete surface problems like scaling and spalling (which can ruin the base under a pour), this overview is useful: how to avoid scaling and spalling in concrete.
Mixing and application mistakes: most cracks start in the bucket
Self leveling compound is picky about water ratio and working time. Too much water makes it easier to pour, but it also weakens the cured surface and increases shrinkage. Not mixing long enough leaves dry pockets. Mixing too long can whip in air. Pouring in lifts outside the product range can crack or curl. And rushing without the right tools (gauge rake, smoother, spiked roller) can trap ridges that telegraph through thin flooring.
Concrete prep that makes self leveling compound bond (the practical process)
We treat prep like foundation work. If we do it right, the pour is calm. If we do it halfway, the pour becomes a stress test.
Here’s the process we follow on most concrete slabs before we pour self leveling compound:
- Confirm the slab is worth bonding to. We scrape off anything loose, chalky, or flaking. If the concrete surface itself is weak, the leveler will only be as strong as what it’s attached to.
- Remove contaminants, not just dirt. Vacuuming is not the same as cleaning. We mechanically remove paint, sealer, old mastic, and drywall mud. If we can’t get to sound concrete, we don’t pour.
- Profile the surface. Most successful pours happen after grinding or shot blasting to create a texture the primer can grip. The goal is a clean, open-pore surface, not a polished slab.
- Address cracks and joints the right way. We don’t “erase” structural cracks with leveler. Depending on the floor plan, we may need crack isolation, joint honoring, or a repair that fits the movement we expect.
- Moisture check and humidity control. We look at the home’s history (musty smells, past leaks, seasonal dampness). If moisture is high, we plan mitigation before the pour, not after the failure.
- Prime exactly as the manufacturer requires. Primer isn’t optional on most slabs. We apply it evenly, let it dry to the right tack, and avoid dusty foot traffic while it cures. Manufacturer guidance can vary, so we always follow the specific system. This overview explains the “why” behind using self-levelling compounds and choosing the right approach: how to fix uneven floors using self-levelling compound.
- Mix with discipline, pour with speed. We measure water, mix in clean buckets, and stage bags so we can pour continuously. Cold water, hot rooms, and strong airflow change set time, so we plan for conditions, not wishful thinking.
For a clear, homeowner-friendly walkthrough of tools and timing, this guide is a solid reference: applying self-leveling compound.

How self leveling compound prep connects to flooring and remodel results in Cumming
We usually pour leveler for one reason: we want the finished floor to look and feel right. Flatness affects tile lippage, LVP click integrity, and the way engineered wood sits underfoot. It also affects how baseboards and cabinets read visually, especially in kitchens.
When we install new flooring Cumming homes often need minor slab correction first, and a rushed leveler job can derail the whole schedule. The same is true when a kitchen remodeling company Cumming homeowners hire is setting cabinets, a “good enough” floor can turn into rocking boxes and ugly shims.
As a remodeling company in Cumming, we plan floors and remodel details together, especially when we’re acting as the kitchen and bathroom remodeling company Cumming Ga homeowners call to tie multiple rooms into one clean finish. And when the project is hardwood, we approach slab prep with the same mindset we use as a hardwood floor company Cumming homeowners trust and as a hardwood floor sanding company Cumming residents rely on, the base matters as much as the topcoat.
For readers also comparing hardwood refresh options in nearby neighborhoods, this pairs well with what we see in the field: Windermere hardwood floor sanding services. If the work is focused on wet areas and tile transitions, our bathroom team approach is here: Cumming bathroom remodeling and flooring services.
We also serve nearby communities, so if you’re looking for a hardwood floor company servicing Windermere, we can evaluate the slab, recommend the right prep, and keep the plan straightforward.
Conclusion
Self leveling compound doesn’t fail because it’s “bad,” it fails because it was asked to bond to a slab it couldn’t trust. When we remove contaminants, profile the concrete, prime correctly, and control moisture, we get a pour that cures dense and stays attached.
If you want us to look at your floor and give a clear plan, call (770) 906-4732 for free estimates. If you show us any existing quote from another contractor, we’ll do it at 5% less for the same scope, and we’ll keep the prep and materials honest so the floor lasts.